Introduction
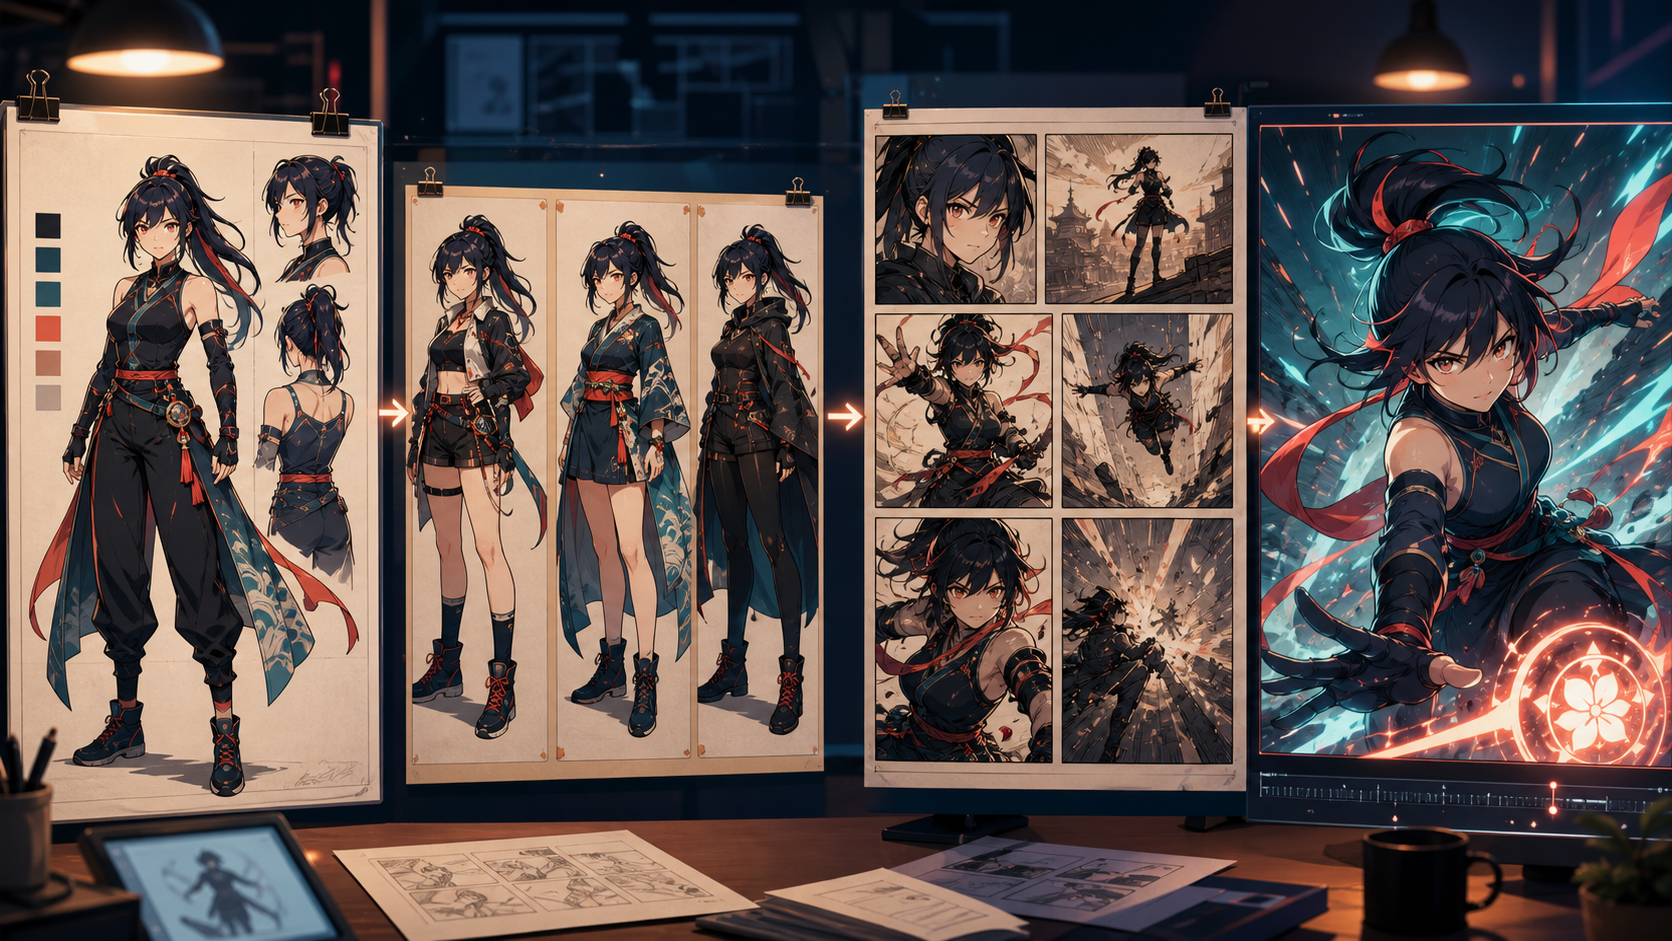
An anime character can look convincing in one portrait and still fall apart across a comic. The hard part is not generating more images; it is carrying the same identity, wardrobe logic, and story decisions from a reference sheet into panels and then into motion. A continuity-first workflow solves that by approving one stable base character before exploring outfits, layouts, or animation.
The production order matters. Define the character and audience, build a reusable reference, create controlled wardrobe options, plan the story as panels, finish the static comic, and animate only the strongest moment. Each stage should inherit approved assets from the stage before it instead of trying to reconstruct the character from memory.
1. Define the Character, Audience, and Delivery Format
Start with the result you need. A vertical social post needs space above and below the character, a landscape banner needs horizontal composition, a comic page needs room for balloons and reading order, and an animation keyframe needs clean edges plus motion space around the body.
Write the character brief in observable terms:
- face shape, eye shape, hairstyle, and age range;
- body proportions and silhouette;
- a restrained base palette and one signature accent color;
- ordinary clothing layers and recurring accessories;
- posture, typical expressions, and movement style;
- the intended audience, genre, and publication format.
Vague requests such as “make the character premium” are difficult to evaluate. A reviewer can compare a crescent-shaped hair clip, teal jacket lining, short black ponytail, or guarded posture from one panel to the next.
2. Approve a Reusable Base Character
Generate several controlled candidates, then approve one neutral character reference before changing clothes. The selected asset should show the face, hair, body proportions, color relationships, and signature details clearly. If possible, keep a front view and a three-quarter view.
Create a continuity card with the approved image and a short written record of:
- immutable identity details;
- palette values;
- body and face proportions;
- hairstyle and accessories;
- default outfit layers;
- prompt wording that produced the accepted result;
- output size and aspect ratio.
Always derive later versions from this approved reference rather than from an image that has already been edited several times. Multi-generation chains accumulate drift. A small face change in outfit two can become the baseline for outfit three unless the original reference remains the comparison point.
3. Create Wardrobe Options With a Story Purpose
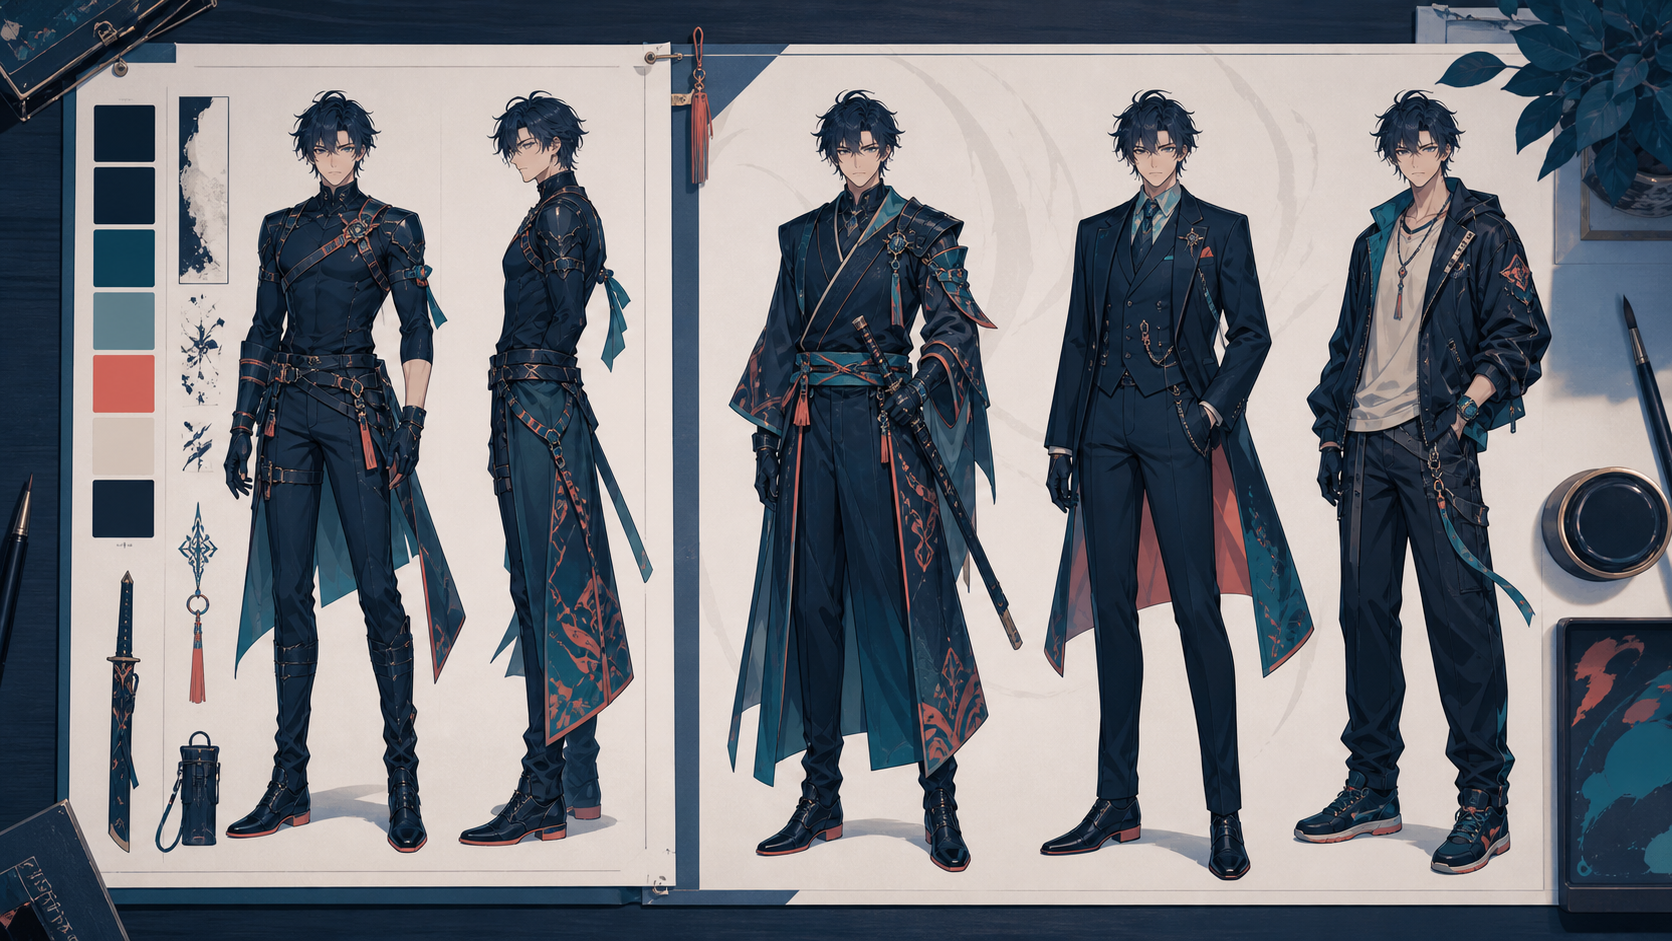
Freeze the base character before exploring clothes. Treat the outfit as the variable and identity as the control. A useful wardrobe is not simply a collection of attractive looks; each version should communicate story information such as occupation, social status, climate, action requirements, or a change in the character's role.
Describe garments as constructed objects. Specify silhouette, layers, material weight, fit, fasteners, footwear, and accent placement. Keep one shared color or accessory across variants so the character remains readable even when the outer silhouette changes. The VideoAny image-to-image tool can be used for relevant visual variation steps, but the continuity card and human comparison remain the source of truth.
Generate three or four candidates per wardrobe decision. Compare identity, pose, fabric behavior, hand-and-sleeve intersections, and whether the outfit serves the scene. Change one category per pass. If an otherwise strong result has one failed cuff, collar, or accessory, repair that region rather than regenerating the entire character.
4. Plan the Story as Six Clear Beats
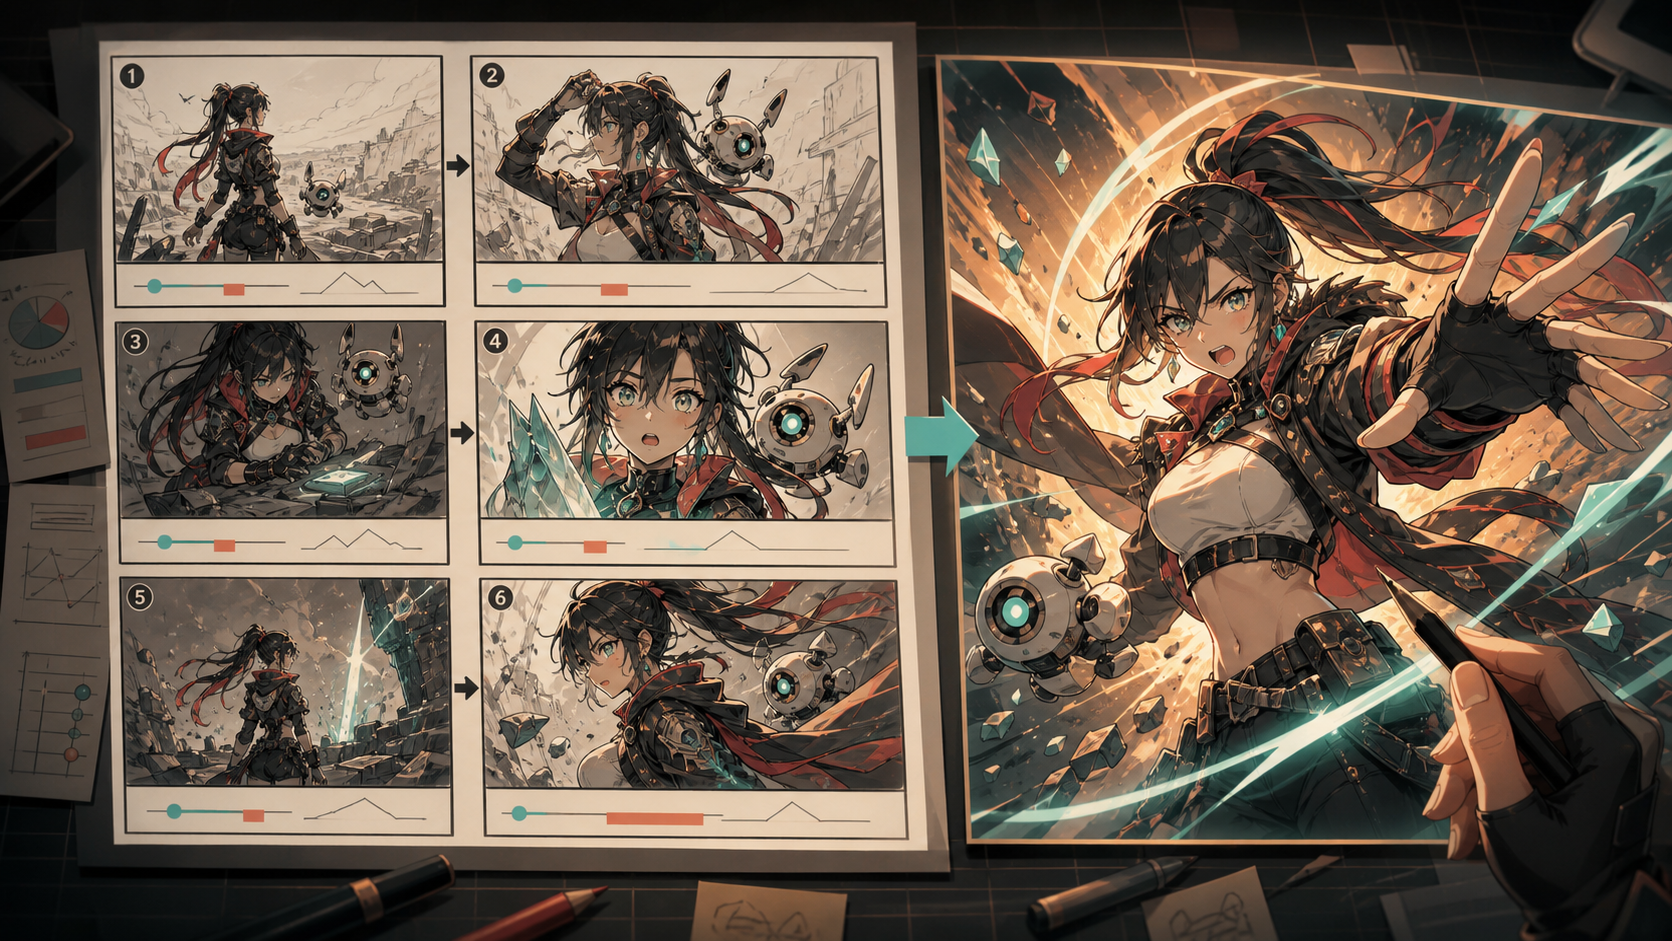
Before composing a page, summarize the conflict in six beats. For an original courier character, a compact sequence could be:
- the courier arrives at an unfamiliar district;
- a mechanical companion detects a hidden signal;
- the pair locate a sealed object;
- opening it triggers a threat;
- the character chooses an action that reveals personality;
- the final image delivers a visual payoff.
Convert each beat into a panel or shot card. Record the panel purpose, framing, character position, action, expression, dialogue or caption allowance, camera direction, transition, and reference asset. Avoid changing camera, outfit, mood, and art style in the same experiment; otherwise you cannot tell which decision caused a successful or failed result.
The outfit should remain tied to the story. An action costume needs movement clearance, a formal uniform should communicate rank, and wet-weather clothing should react consistently to the environment. Clothing that changes only for novelty weakens continuity.
5. Produce the Static Comic Before Animation
Assemble the comic at its real reading size first. At page scale, check eye flow, panel hierarchy, character readability, and whether the action can be understood without an explanatory paragraph. Then zoom to full resolution to inspect fingers, garment seams, face consistency, edge artifacts, and background continuity.
Keep text and artwork separate where possible. Reserve balloon and caption space during composition, but add final readable lettering in a deterministic design or publishing tool. This avoids relying on generated text and makes localization easier.
Use the same approved character reference at every handoff. The storyboard, wardrobe sheet, panel generator, and final layout should inherit decisions, not reinterpret them. Meaningful filenames such as mira-base-approved, mira-rain-outfit-v03, and panel-04-selected make rollback possible when a later experiment drifts.
6. Animate Only the Strongest Key Moment
Animation should begin after the character, outfit, and framing are stable. Select the one panel with the clearest reveal, reaction, or movement. Define one main action, preserve the character reference, and keep camera motion restrained. Relevant still-to-motion work can begin with VideoAny image to video, followed by normal editing, sound, captions, and quality review.
This selective approach keeps the workload realistic. A six-panel comic does not need six equally complex animated shots. One strong reveal can become a teaser while the complete static sequence remains the primary story. Review the animated result for face drift, clothing changes, broken hands, altered palette, and whether the motion starts naturally from the approved keyframe.
A Practical Character-to-Comic Example
Imagine an original heroine named Mira. First approve a neutral reference with one recognizable accent color. Design three outfits for distinct story functions rather than three random fashion ideas. Write a six-beat conflict, convert it into a storyboard, and assemble a comic draft. Only after the static page passes identity and pacing review should the strongest reveal panel become an animation test.
At every transition, pass the approved asset forward. Do not ask the next tool to recreate Mira from prose alone. The workflow is successful when the character remains recognizable, the wardrobe changes have narrative logic, the panel sequence reads clearly, and the animated moment feels like the same production rather than a separate experiment.
Common Mistakes and Better Fixes
- Weak input reference: replace a small, poorly lit, or occluded source before attempting more generations.
- Conflicting geometry: do not request a pose or camera angle that the reference cannot support without major reconstruction.
- Treating the first result as final: plan a selection and cleanup pass.
- Changing identity and outfit together: freeze the base character and isolate the wardrobe variable.
- Animating too early: stabilize the static design and story framing first.
- Relying on memory: maintain a reference sheet, continuity card, and version history.
Rights, Safety, and Publication Review
Use original characters or material you have permission to transform. Do not imply that fan concepts are official merchandise, and check trademark or franchise policies before commercial use. Keep a source and rights record for commissioned projects. If a recognizable person informs the reference, obtain consent and avoid deceptive presentation.
Before publishing, compare every panel with the approved character sheet at full resolution and at actual reading size. Confirm that the same character survives every outfit, shot, and format. That disciplined transfer of decisions—more than the number of generated images—is what turns a character concept into a coherent comic and a usable animation moment.
FAQs
What should I save between stages?
Keep the approved character reference, palette, outfit description, prompt, aspect ratio, selected outputs, story beats, and continuity decisions.
How many outfit candidates should I create?
Start with three or four controlled versions. Fix the reference or brief if all candidates fail in the same structural way.
Do I need professional drawing skills?
Not necessarily, but composition, visual continuity, lettering, and version-management skills materially improve the final result.
Can the finished character and comic be used commercially?
Commercial use depends on the rights to the source material, character, references, brand elements, and the terms of every service used in production.