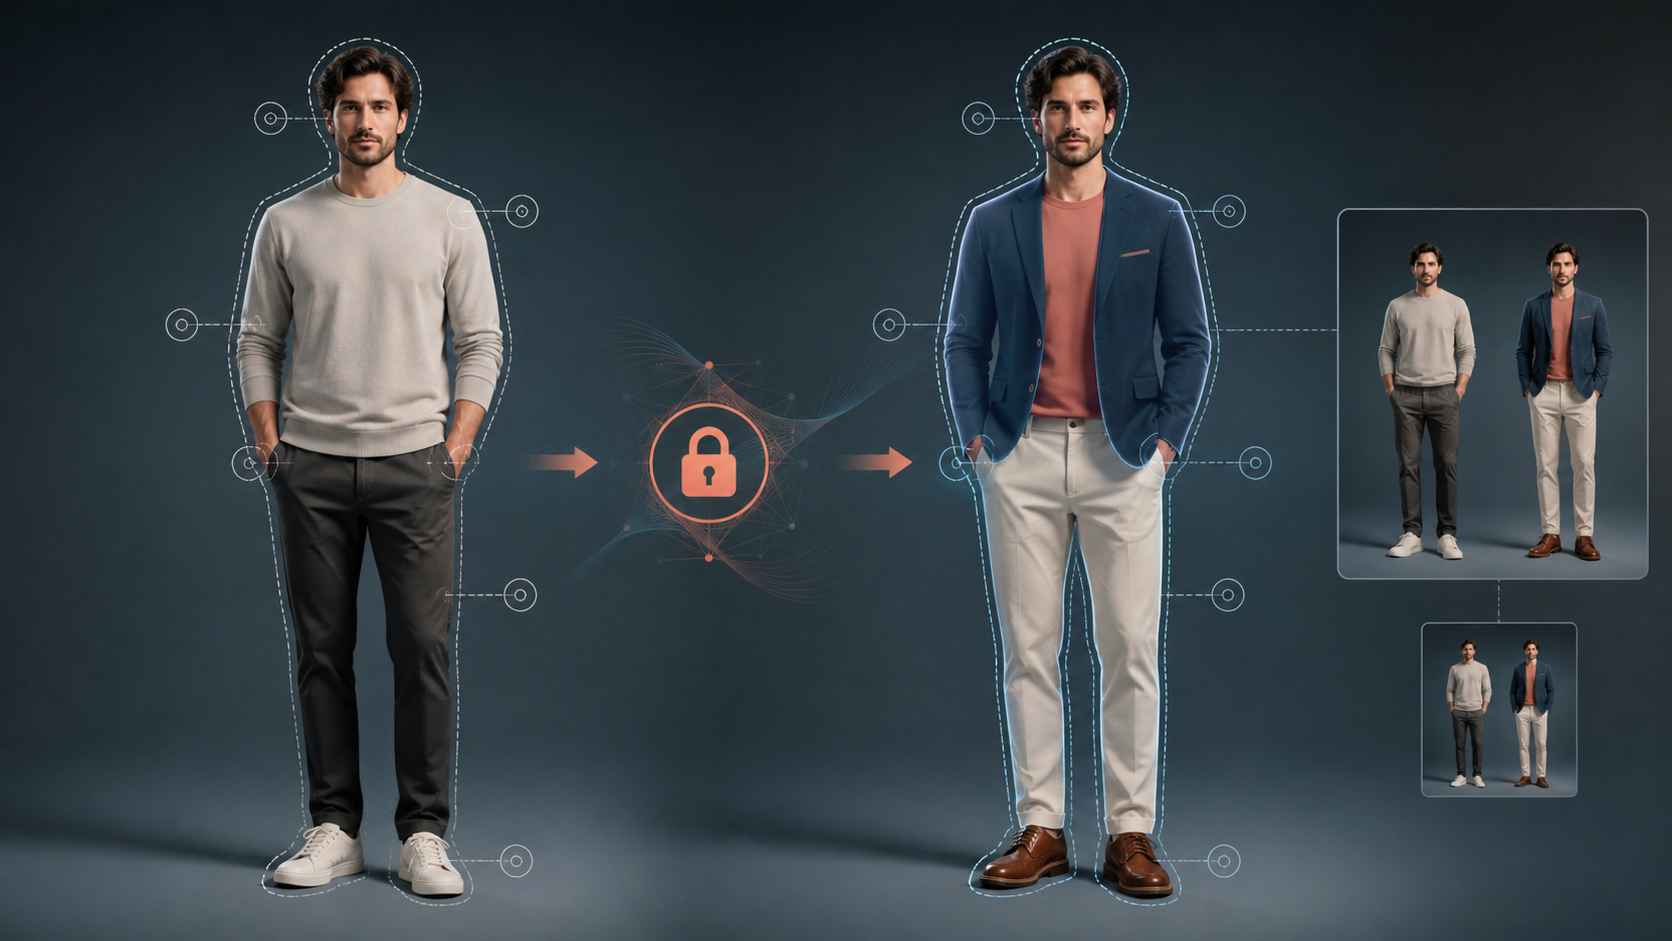
Changing an outfit without changing the person is a problem of boundaries. The wardrobe must be allowed to change, while the face, hair, anatomy, pose, hands, camera, crop, lighting, and background remain anchored to the approved source. If those boundaries are vague, an attractive result can still be unusable because the subject no longer looks like the same person.
The reliable method is a local wardrobe edit with an explicit acceptance test. Define what is fixed, what may change, and how every candidate will be judged. Generate a small comparable batch, reject identity drift immediately, and repair only the region that actually failed.
Write a Fixed–Change–Evaluation Brief
Before generating, turn the goal into a short production brief. A three-column format makes hidden assumptions visible:
| Fixed | Allowed to change | Evaluation test |
|---|---|---|
| Face shape, features, expression, skin details | Garment type, color, material, fit | Overlay or side-by-side face comparison shows no reshaping |
| Hairline, hairstyle, length, and color | Clothing that passes behind or beneath the hair | Original strands and hair silhouette remain recognizable |
| Anatomy, body proportions, pose, and hand position | Coverage required by the new wardrobe | Joints, limbs, and hands stay in the same locations |
| Camera angle, focal perspective, crop, and aspect ratio | Nothing | Subject and frame align with the source |
| Background, lighting direction, and ground plane | Shadows logically affected by the new silhouette | Scene remains continuous and the person stays grounded |
| Approved personal accessories | Only accessories explicitly listed for removal or replacement | No invented jewelry, props, or logos appear |
Add delivery requirements such as resolution, aspect ratio, color profile, and the size at which the image will be published. A candidate passes only when it meets the identity test and the delivery test—not merely because the outfit looks good.
Choose a Source That Supports a Local Edit
Use a clean, sufficiently large image in which the face and wardrobe boundaries are readable. The neck, shoulders, wrists, waist, and visible hems are especially important because they connect the clothing to the body. Heavy compression, motion blur, or severe occlusion forces the model to invent structure.
Do not change the crop, camera angle, pose, and outfit in one request. Each added change widens the generation problem and makes identity drift harder to diagnose. Prepare the source first: orient it correctly, choose the final framing, and correct major exposure issues. Then use that exact approved image as the master reference for every candidate.
When working through an image-to-image process, return to the master rather than generating each new attempt from the last attempt. A chain of generated images can gradually alter facial proportions, hair, hands, and background even when no single step looks dramatic.
Describe the Wardrobe as a Bounded Replacement
Start the instruction with the preservation boundary, then describe the new outfit from top to bottom. Use concrete garment terms instead of general praise:
Replace only the visible clothing. Preserve the same person, face, expression, hair, anatomy, body proportions, pose, hand position, camera, crop, lighting, background, and personal accessories. Change the wardrobe to a structured navy blazer worn open over a matte ivory crew-neck top, straight high-waisted trousers, and low-profile leather shoes. Keep the fit consistent with the existing stance and preserve realistic folds, contact points, and shadows.
This wording does two jobs. It limits the edit area and gives the wardrobe enough construction detail to fit the existing body. Specify silhouette, layer order, material, closure state, length, and fit. State whether a shirt is tucked, a jacket is open, a belt sits over or under another layer, and hair passes in front of or behind a collar.
Avoid instructions that implicitly ask for a different photograph, such as “make the pose more confident,” “use a fashion camera angle,” or “give the scene dramatic lighting.” Those may be good creative directions in a separate experiment, but they conflict with an identity-preserving wardrobe edit.
Respect Geometry Compatibility
The new outfit must be compatible with the evidence in the source. A fitted shirt can follow a clearly visible torso. A large coat may need to reconstruct hidden waist and arm areas. A floor-length dress introduced over a wide trouser stance changes the silhouette between the legs and may require more invention. The larger the geometry change, the more carefully you must review anatomy and contact.
When the requested silhouette is too different, create an intermediate version. First stabilize a simpler outfit with similar coverage; then change one region or layer at a time. If the intended design truly requires a new pose or crop, treat that as a separate scene-generation task rather than claiming the person and photograph are unchanged.
This distinction keeps the production promise honest: “same identity in a new scene” is not the same acceptance standard as “same image with only the clothes replaced.”
Generate a Small, Comparable Batch
Generate three or four candidates with the same source, preservation boundary, outfit description, aspect ratio, and major settings. If you vary the outfit, camera, and style at once, you cannot tell which instruction caused a failure. A controlled batch makes selection an evaluation task rather than a search for the most surprising image.
Review the foundation in a fixed order:
- Face shape, feature spacing, expression, and skin details.
- Hairline, hairstyle, hair length, and strands crossing the clothing.
- Neck, shoulders, anatomy, body proportions, and pose.
- Hands, fingers, wrists, pockets, cuffs, and accessories.
- Garment silhouette, construction, layer order, material, and seams.
- Background alignment, lighting direction, ground contact, and crop.
Any face reshaping is a rejection, even if the wardrobe is excellent. Do not plan to “fix the face later” after approving a drifted candidate; later repairs can create another synthetic interpretation and weaken the identity anchor.
Review at 100% and at Delivery Size
Full-resolution inspection reveals facial drift, merged fingers, false seams, broken fabric edges, and noisy textures. Delivery-size inspection reveals a different class of problems: a muddy silhouette, weak contrast, confusing layer order, or a face that no longer reads as the same person on a phone.
Compare against the source at both scales. A side-by-side view is useful for overall judgment; a temporary low-opacity overlay can expose movement in the eyes, jaw, hairline, shoulders, hands, or crop. The overlay is an evaluation aid, not proof of identity, so combine it with human review and the written acceptance test.
Also inspect areas indirectly affected by the outfit. A wider hem may require a different shadow. A high collar must interact correctly with hair. A sleeve change may alter the apparent arm edge without moving the actual wrist. These consequences are allowed only when they logically follow the new clothing.
Use Masks Only to Limit Scope
If your editor supports masks or local selections, use them to indicate where a change is allowed—not as a guarantee that everything outside the mask will remain perfect. Cover the garment region carefully, provide a little context at contact edges, and keep the face and hair excluded unless the new collar genuinely passes behind them.
After every masked edit, recheck the complete frame. Models can still influence nearby pixels, lighting, or edge detail. A mask narrows the problem; it does not replace identity review.
For a small defect such as one cuff, button, hem edge, or pocket interaction, repair that region instead of regenerating the entire image. If the face, anatomy, pose, or background has changed, revert to the last approved version rather than stacking additional fixes on an unstable result.
Keep Approved and Experimental Versions Separate
Create an “approved” branch and an “experimental” branch in your asset workflow. The approved branch contains the source, accepted wardrobe version, prompt, settings, and any verified local repairs. The experimental branch can test bolder colors, materials, silhouettes, or styling without replacing the known-good asset.
Use descriptive filenames or a simple change log: source-approved, wardrobe-v01-review, wardrobe-v02-approved, and collar-repair-v01. Record why a version passed or failed. This separation makes it easy to return to a stable image and prevents an attractive experiment from quietly becoming the new identity reference.
Quality, Safety, and Rights
Use photographs and reference art you own or have permission to edit. Obtain explicit consent before changing the appearance of a recognizable person, and do not use a wardrobe swap to imply that someone endorsed, attended, wore, or promoted something they did not.
For commercial work, review applicable copyright, publicity, trademark, client, and platform rules. Keep a provenance note containing the source, permissions, prompt, selected output, repair history, and final publication context. Clearly label a conceptual mockup when viewers might otherwise read it as documentary evidence or a real product photograph.
Final Checklist
- The fixed, change, and evaluation columns are written down.
- Every candidate starts from the same approved source.
- The outfit description includes silhouette, layer order, material, fit, and coverage.
- Face, hair, anatomy, pose, hands, camera, crop, background, and lighting were compared directly.
- The result passed at 100% and at delivery size.
- Any local repair was limited to the actual defect and the full frame was rechecked.
- Approved and experimental versions remain separate.
- Consent, source rights, and publication context are documented.
The strongest wardrobe edit is deliberately uneventful outside the clothes. The person remains unmistakably the same, the scene stays stable, and the new garment behaves as if it was present when the photograph was made. Explore VideoAny’s AI models when you are ready to test a bounded outfit variation from an approved image.
FAQs
Why does the face change when I only request new clothes?
The generation scope may still be too broad, or the source may not provide enough facial detail. Use the approved source for every candidate, explicitly freeze facial and scene attributes, limit the editable region, and reject any face reshaping immediately.
Can a mask guarantee that the person will stay unchanged?
No. A mask can narrow the intended edit area, but nearby pixels, lighting, and edges can still shift. Compare the full result with the source after every local edit.
Should I accept a great outfit and repair the changed face afterward?
No. Return to the approved source and regenerate the wardrobe within a tighter boundary. Treating a drifted face as the new base weakens identity consistency and adds unnecessary repair risk.
What if the new outfit requires a completely different silhouette?
Use intermediate versions or treat the request as a new-scene task with its own acceptance criteria. A major pose, crop, or anatomy reconstruction should not be described as changing only the clothes.