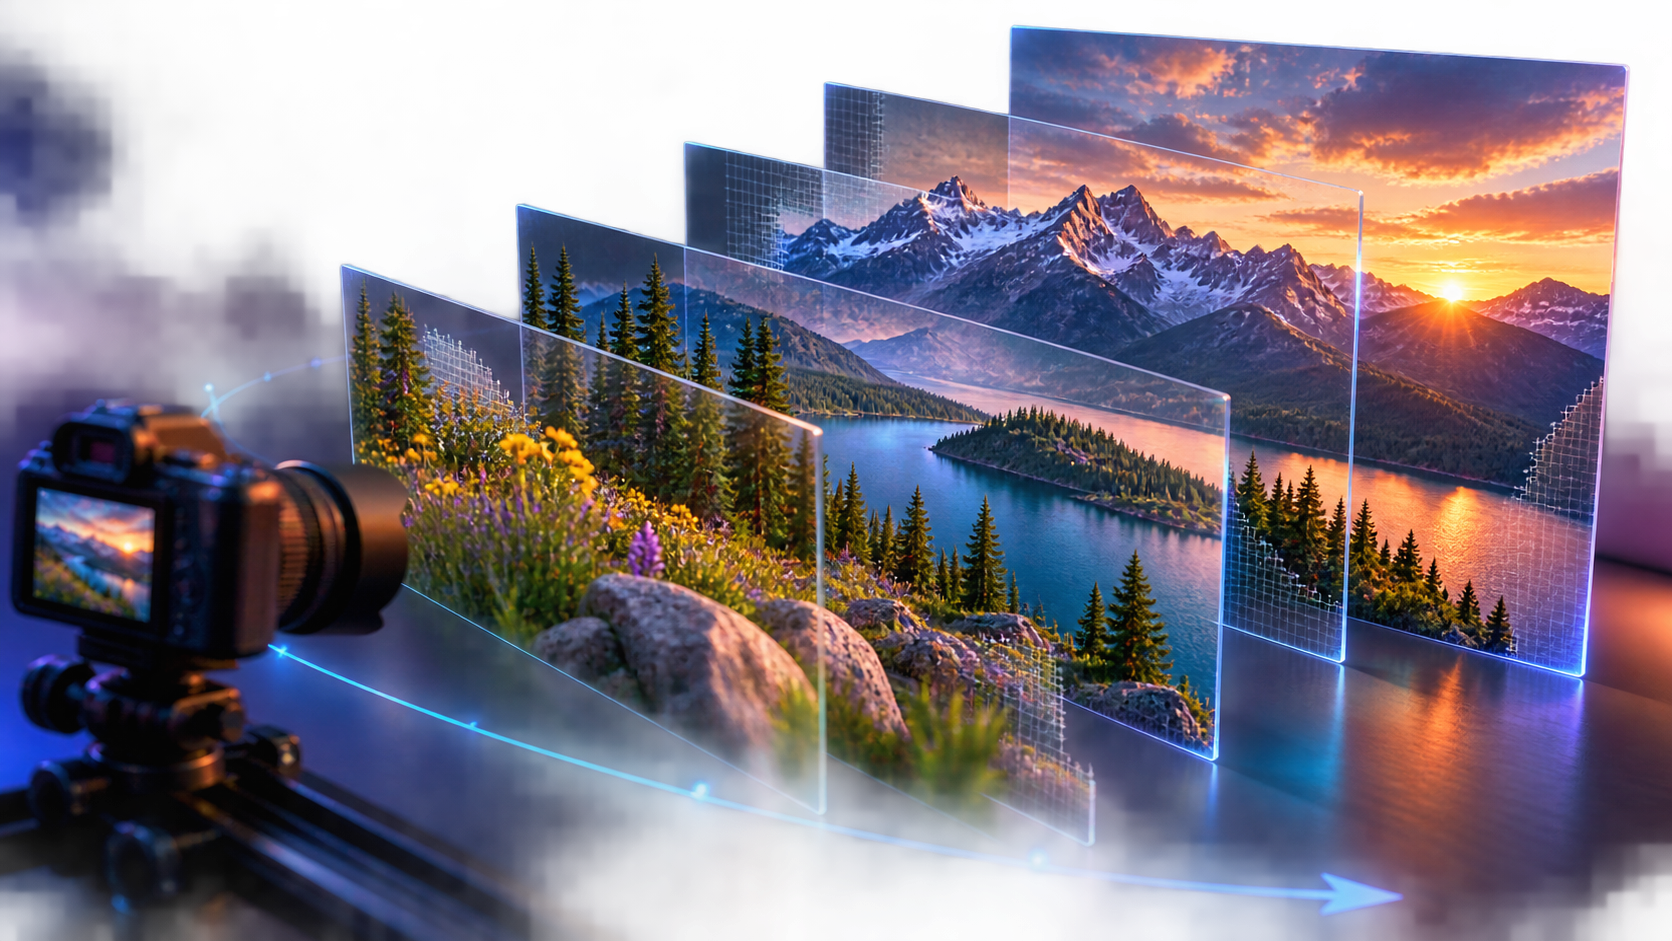
An AI parallax video from a photo creates the impression that a camera is moving through a scene rather than sliding across a flat card. Foreground objects shift more than distant objects, revealing a sense of depth from one still image.
The effect is attractive because it can make a landscape, product shot, artwork, or authorized portrait feel cinematic without a full 3D build. It is also easy to overstate. VideoAny does not need to be presented as having a dedicated parallax mode, editable depth map, direction slider, or motion brush. A supported image-to-video model can instead be prompted to create parallax-style camera motion, and the creator must inspect whether the illusion holds.
This guide retains the practical process of uploading a photo, defining the motion, adding atmospheric direction, generating, and reviewing. It adds the checks that matter when a model invents hidden areas behind foreground objects.
Responsible-use baseline: Upload only photographs you own or are authorized to transform. Mature material must involve consenting adults. Never create or share content involving minors, non-consensual imagery, exploitation, deceptive impersonation, or an unauthorized likeness.
Parallax Is Relative Motion, Not an Ordinary Zoom
A normal digital zoom enlarges every pixel at the same rate. A Ken Burns move pans or scales the same flat image. Parallax creates a different visual relationship:
- a foreground flower may cross the frame quickly;
- a midground tree line may shift less;
- a distant mountain may barely move;
- the sky may remain nearly fixed.
Those relative speeds imply distance. The result is still a 2D video, not a guaranteed 3D reconstruction. If every part moves together, the clip is a pan or zoom. If layers move in the wrong order, the scene can feel like cardboard sliding apart.
Use parallax-style generation when depth relationships are central to the idea. Use a simple pan or zoom in an editor when the image is flat, fragile, or too important to let a model invent hidden content.
Choose a Photo With Clear Depth Planes
The source image determines whether the model has enough visual evidence to separate space.
Foreground
Look for a frame edge, foliage, furniture, fabric, architectural opening, or product element near the camera. It should have a clean silhouette and enough surrounding area to move without immediately leaving the frame.
Midground
The main subject usually sits here: a product, building, authorized adult portrait, sculpture, vehicle, or group of objects. Keep the important form away from hard crop boundaries.
Background
A horizon, wall, landscape, room, skyline, or atmospheric field provides the distant layer. Large gradients and coherent texture are easier to extend than tiny repeated patterns or dense crowds.
Occlusion Boundaries
Every overlap hides information. When the camera shifts, the model must invent what was behind a tree, shoulder, bottle, or building. Inspect these boundaries in the still before upload. Thin hair, fingers, lace, fences, typography, and transparent objects are especially fragile.
Travel Margin
Leave space in the direction of camera travel. A subject touching the left edge cannot support a strong rightward reveal without new pixels being synthesized. A modest crop and gentle move usually look more convincing than an extreme orbit.
Pick One Camera Move
Direction and intensity may sound like dedicated controls, but those controls are not universal in VideoAny. Express the move in the prompt and use any relevant settings only when the selected model exposes them.
Lateral Slide
A slow left-to-right or right-to-left camera slide produces clear relative motion across depth planes. It works well for landscapes, rooms, layered artwork, and product arrangements.
Gentle Push-In
A slow dolly forward can emphasize a midground subject while foreground elements move outward. It is subtler than a sideways slide and often more stable for portraits.
Rise or Tilt
A slight upward camera rise can reveal a horizon behind foreground objects. It needs extra space above the subject and may expose missing background content.
Avoid a Full Orbit From One Photo
A dramatic orbit asks the model to invent the sides and back of objects that the photograph never showed. Unless the creative goal accepts a strongly generative result, use a small translation rather than promising accurate 3D rotation.
Five Steps to Create a Parallax-Style Clip
Step 1: Prepare and Upload the Photo
Open Image to Video, choose a model, and upload a rights-cleared image. Confirm its crop and orientation. Make a separate working copy if you need to extend canvas space or remove an unstable edge before generation.
Do not assume the system creates an editable depth map. Your job is to communicate the visible planes through the image and prompt.
Step 2: Define the Camera and Layer Motion
Write the prompt from camera to depth:
slow camera slide from left to right; foreground flowers pass gently across frame; midground pine trees shift more slowly; distant lake and mountains remain stable; preserve the original sunset lighting and natural geometry
Name a foreground, a middle subject, and a background. Specify one direction and a restrained pace. Avoid mixing “pan left,” “camera moves right,” “zoom in,” and “orbit” in the same short prompt.
Step 3: Add Atmosphere and Delivery Settings
Add only a supporting environmental cue: subtle leaf movement, drifting mist, changing reflections, dust, or a small light shift. Atmosphere should reinforce depth rather than become a second main event.
Choose the target aspect ratio before generating. Common options include 16:9, 9:16, and 1:1 on models that support them. Duration and resolution also vary by model. A strong wide landscape may fail after a narrow vertical crop, so prepare a separate composition when needed.
Step 4: Generate a Conservative Test
Start with a gentle move. Review how the model interprets depth, then increase travel only if the hidden areas remain coherent. Create controlled variants with one change at a time:
- locked environment versus subtle atmosphere;
- lateral slide versus push-in;
- lower versus higher implied motion intensity.
There may be no dedicated intensity control. The variation can come from prompt wording or an available model setting.
Step 5: Preview, Correct, and Download
Watch the clip at full size and scrub slowly through the overlaps. If the depth illusion works, download the approved version. If an edge stretches or a background hole opens, reduce the move, reframe the source, simplify the layer description, or choose a flatter edit.
Do not describe the result as reconstructed 3D footage. It is an AI-generated depth interpretation from a single view.
A Reusable Parallax Prompt Formula
Use:
camera path + foreground relative motion + midground subject behavior + background stability + one atmospheric cue + preservation instruction
Landscape Example
Slow rightward camera slide through a mountain overlook; nearby wildflowers cross the foreground with gentle breeze movement; pine trees shift more slowly; lake, distant peaks, and sunset remain stable; preserve natural scale, shoreline geometry, and warm reflections.
Product Example
Subtle camera push toward an original ceramic bottle on a licensed tabletop photograph; foreground leaves move outward slightly; bottle shape and label placement remain stable; background lights shift softly; preserve product proportions and clean edges.
Small text and logos may still distort. Inspect every frame before commercial use.
Digital-Art Example
Gentle upward camera rise through a rights-cleared fantasy illustration; foreground stone arch lowers in frame; central glass castle stays anchored; distant clouds drift slowly; preserve the painted linework, palette, and layered-paper feeling.
Authorized Adult Portrait Example
Slow, shallow push-in on an authorized portrait of a confirmed adult; foreground curtain edge shifts slightly; subject remains stable with minimal natural breathing; background lights separate gently; preserve identity, age, clothing, and original composition.
Use portrait material only with explicit permission for AI transformation and the intended distribution context.
Diagnose Common Parallax Failures
Edge Stretching
Symptom: A foreground object elongates as it moves.
Cause: The prompt asks for more travel than the source margin supports.
Response: Reduce movement, extend the working canvas beforehand, or reframe so the object has space.
Occlusion Holes
Symptom: A smear or empty patch appears behind a moving object.
Cause: The model must invent a hidden region with too little context.
Response: Decrease separation, choose a cleaner overlap, or use a conventional pan that does not reveal the hidden area.
Depth Inversion
Symptom: A distant element moves faster than the foreground, making the scene turn inside out.
Cause: Ambiguous planes or conflicting camera language.
Response: Name the layers explicitly and simplify to one camera direction.
Subject Drift
Symptom: A face, product, or building changes shape while the camera moves.
Cause: Too much subject animation, camera travel, or fragile source detail.
Response: Ask for a stable midground subject, reduce the move, and remove extra atmospheric effects. Reject variants with identity or age drift.
Cardboard Layers
Symptom: Objects look like flat cutouts moving independently.
Cause: Separation is too strong or the source lacks intermediate depth cues.
Response: Use smaller relative shifts, a gentle push-in, or a basic Ken Burns move.
Unwanted Crop
Symptom: The subject or foreground layer leaves the frame.
Cause: Ratio and travel were planned separately.
Response: Prepare the destination crop first and leave safe margins around important content.
When a Ken Burns Move Is Better
Choose a simple edit-based pan or zoom when:
- the photo has no clear foreground layer;
- exact typography, product geometry, or identity must remain unchanged;
- the image is archival evidence and invention would be misleading;
- transparent, reflective, or intricate edges dominate;
- only a subtle documentary motion is needed;
- the parallax tests introduce more artifacts than depth.
A flat move is not a lesser result. It can be the more accurate and professional choice.
Use Cases for Parallax-Style Video
- Social creators: add a compact depth reveal to an original travel, environment, or character image.
- Marketers: animate licensed product and lifestyle photography while protecting proportions and marks.
- Advertisers: create a restrained visual entrance for a campaign frame, then test the actual destination crop.
- Meme creators: add exaggerated depth to original or lawfully reusable imagery without impersonating a private person.
- Digital artists: turn layered artwork into a moving composition that preserves linework and palette.
- Adult creators: add subtle depth only to authorized material involving consenting adults and publish where permitted.
- Hobbyists: experiment with depth cues without constructing a full 3D scene.
The technique should support the content, not become a claim that every photo can become accurate 3D.
Credits, Resolution, and Tool Boundaries
VideoAny uses credits, with cost determined by the selected model and settings. Many video models calculate usage from duration and quality; some configurations use a fixed amount per generation. Check the live estimate and pricing options rather than assuming a universal per-second rate.
Ratio, duration, and resolution are model-dependent. Some models support 1080p or higher; others have lower limits. Higher resolution cannot repair depth inversion or an occlusion hole. Test the move first, then choose the delivery setting.
Video to Video can transform footage that already contains real camera motion, but it solves a different problem. Text and reference inputs can guide complementary shots where supported. None of these modes should be described as a dedicated parallax editor unless the product actually exposes that feature.
Frequently Asked Questions
Does VideoAny have a dedicated parallax tool?
This guide does not claim one. It uses image-to-video prompting to request parallax-style camera and layer motion on supported models.
Does the AI create a real 3D model or editable depth map?
Not as a capability claimed here. The output is a generated 2D video that may create a 3D-like depth illusion.
Which camera move should I try first?
Use a restrained lateral slide for clear layers or a gentle push-in for a centered subject. Avoid combining multiple directions.
Can I use a portrait?
Only if you own the image or have the necessary license and the recognizable adult has explicitly approved AI transformation and the intended context. Never use minors in mature content or an unauthorized likeness.
Why does the background smear?
The camera move is probably revealing areas hidden in the source photo. Reduce travel, choose a cleaner image, prepare more canvas, or use a simple pan or zoom.
Build Depth, Then Protect the Edges
An effective AI parallax video from a photo begins with a layered image and one restrained camera move. Name foreground, midground, and background behavior; add only one atmospheric cue; and choose the delivery crop before generation.
The final test is not how dramatic the motion looks. It is whether the scene keeps its geometry as depth appears. Inspect occlusion boundaries, reject identity drift, and switch to a conventional pan when the photograph cannot support invented space. That is how a subtle 3D-like illusion becomes a usable video rather than a warped still.