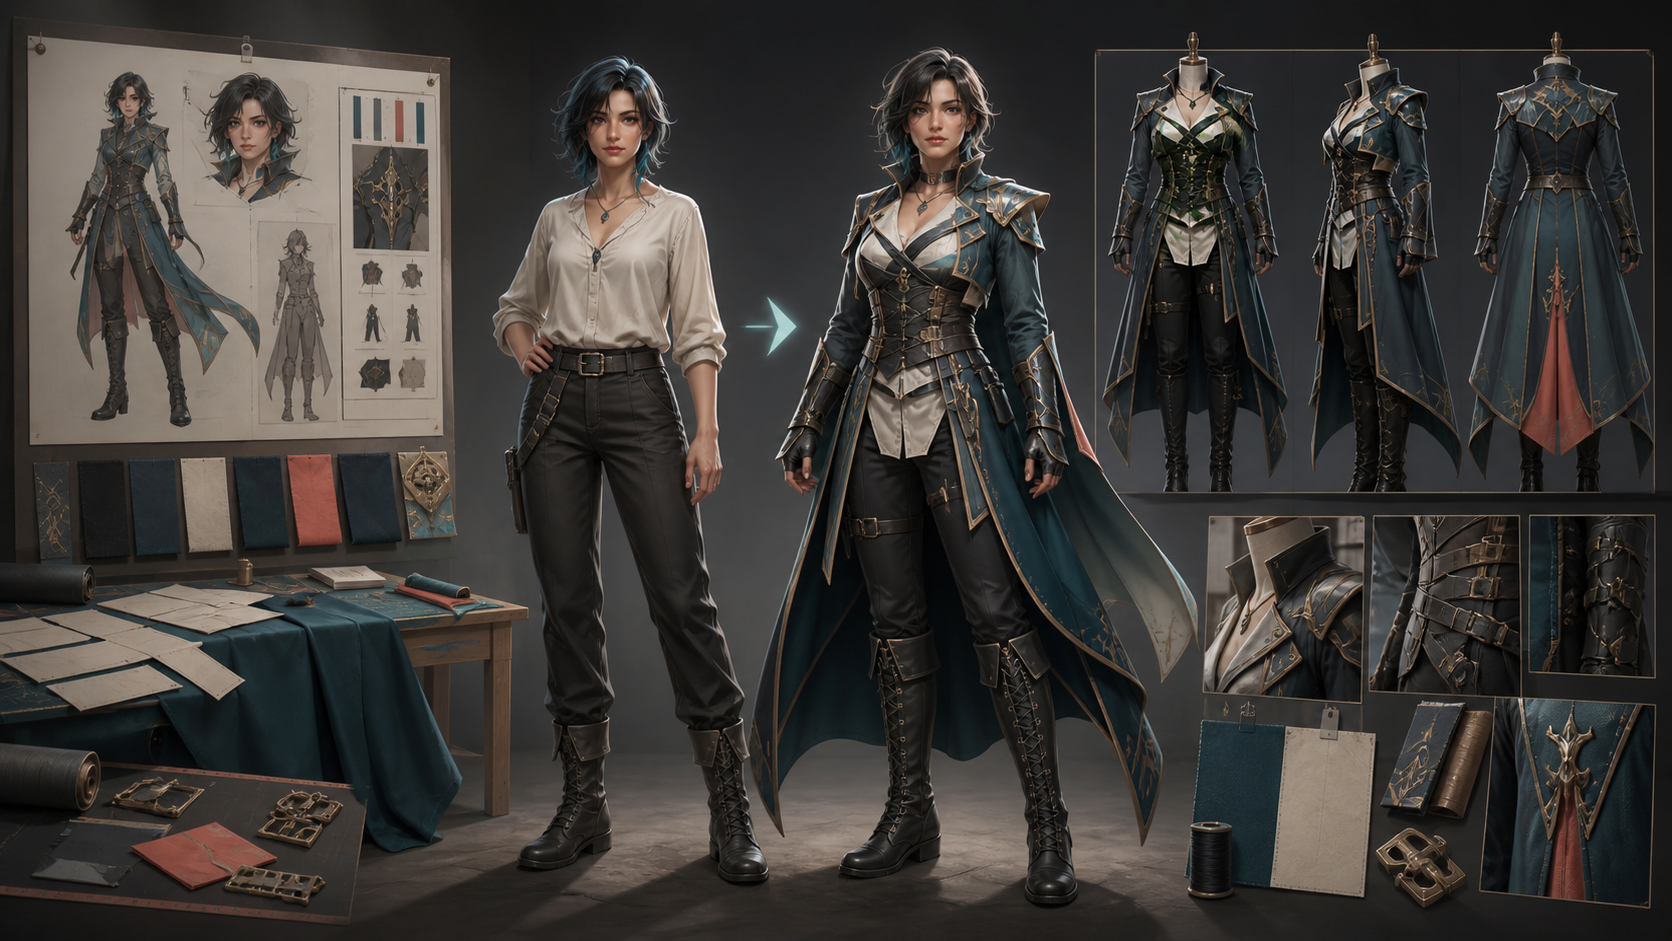
An AI clothes changer can turn a character portrait into a useful cosplay concept, but a convincing result needs more than an elaborate costume prompt. The person or original character must remain recognizable, the outfit must look wearable, and every prop and layer must make sense from more than one viewing angle.
The most reliable approach is to treat the image as a costume-development document rather than a one-click transformation. Lock the character first, translate the design into real garment construction, test a small set of variations, and only then prepare the concept for a post, pitch, or animated shot.
Start With the Result You Actually Need
Before generating, decide how the concept will be used. A vertical reveal needs a clear head-to-toe silhouette. A maker reference needs readable seams, closures, and layer order. An animation keyframe needs enough room around capes, props, or hair for later motion.
Write a short acceptance test before you open an image tool:
- The face, hairstyle, body proportions, pose, and framing still match the approved source.
- The costume has a readable silhouette and a plausible way to be put on and taken off.
- Hands, hair, weapons, belts, and fabric overlap in the correct order.
- The image works at both full resolution and its final publishing size.
- The concept is clearly labeled when it represents a fan design rather than an official product.
These criteria keep visual novelty from hiding structural errors.
Build an Identity Anchor Before Changing Clothes
Start with a clean, sufficiently large source image. A three-quarter or full-body pose with visible arms, waist, and legs gives the model more evidence about anatomy and garment placement than a tightly cropped portrait. Avoid references in which hair, hands, or props hide most of the clothing area unless those occlusions are part of the desired design.
Create an identity anchor: a compact description of the details that must not drift. Include face shape, eye spacing, hairstyle and color, body proportions, signature accessories, pose, camera angle, lighting direction, and background. If the subject is an original character, add the two or three features that make the design unmistakable.
The change request should be narrower than the identity anchor: change the wardrobe and necessary costume props, while preserving everything else. If a candidate reshapes the face or changes the anatomy, reject it rather than accepting the costume and trying to restore the person later.
You can use an image-to-image workflow to create controlled variations from an approved reference, then compare the outputs against the same identity checklist.
Translate the Fantasy Design Into Wearable Construction
Prompts such as “epic armor” or “premium cosplay” describe taste, not construction. Break the look into parts that a costume maker could identify:
- Silhouette: fitted, oversized, armored, layered, asymmetrical, or floor-length.
- Base layers: shirt, bodysuit, trousers, skirt, or undersuit.
- Outer layers: coat, robe, chest piece, shoulder pieces, cape, or harness.
- Closures and support: zippers, buckles, lacing, straps, magnets, rigid backing, or hidden fasteners.
- Materials: matte cotton, heavy wool, soft leather, EVA-foam armor, satin, translucent organza, or weathered metal.
- Mobility: space at the shoulders, knees, elbows, and waist so the design could move with a performer.
- Props and scale: where a sword, pouch, wand, or helmet attaches and how large it is relative to the body.
A complex fantasy uniform might therefore become: “structured navy coat over a fitted black base layer, high collar with a rear closure, articulated shoulder armor attached by visible straps, knee-length split tails for movement, brushed silver trim, and a belt-supported prop sheath.” The description gives the generator relationships it can preserve.
Pay special attention to contact points: collars beneath hair, gloves around wrists, belts over coats, armor beside elbows, and boots meeting the ground. These are where an attractive costume most often stops looking wearable.
A Six-Step Cosplay Concept Workflow
- Choose one approved base image. Correct the crop, exposure, and pose before introducing costume changes.
- Write the fixed-versus-change brief. Put identity, anatomy, camera, and background in the fixed column; put only wardrobe, costume props, and allowed styling changes in the change column.
- Describe construction and fit. Specify layer order, material weight, closures, support, mobility, and how accessories attach.
- Generate three or four candidates. Keep the reference, prompt, aspect ratio, and major settings stable so the comparison is meaningful.
- Select for structure before decoration. Judge silhouette, identity, anatomy, and overlaps first. Only after those pass should you compare embroidery, surface texture, or color accents.
- Repair locally and export deliberately. Fix an isolated cuff, hand, buckle, or collar without reopening the entire image. Then export for the intended platform rather than relying on a last-minute crop.
Working in a small batch is useful because it separates repeatable design decisions from lucky accidents. Save the approved prompt and base image alongside the final candidate so another angle can follow the same rules.
Test the Costume From More Than One Angle
One front-facing render can conceal impossible construction. Before using the design in motion, create at least a front and a three-quarter mockup. Compare the layer order, emblem placement, prop scale, hair interaction, and hem length across both views.
If the outfit changes radically between angles, simplify it. Lock the dominant silhouette and signature details, reduce competing accessories, and regenerate. For a real build, add a rear-view sketch or a written note for closures and support even if it will never appear in the final post.
Inspect every candidate at 100% for facial drift, broken fingers, merged accessories, noisy patterns, and false seams. Then inspect it again at delivery size. A detail that looks impressive when enlarged may disappear on a phone, while a confusing silhouette remains confusing at every scale.
Know the Boundary Between Fan Art and Official Work
A cosplay concept can involve several different rights: the source photograph, the person’s likeness, the character design, logos or insignia, and the final generated image. Use photos and artwork you own or have permission to edit, and obtain consent before modifying a recognizable person. Do not present a fan concept as an official costume, licensed collaboration, or real event.
For commercial use, review the relevant character, trademark, platform, and event rules instead of assuming that a fan-art label grants permission. Keep a provenance record with the source asset, permissions, prompts, selected output, local repairs, and publication context. Clear records are especially useful when a client, model, photographer, or costume maker is involved.
Final Quality-Control Pass
Before publishing or sending the concept to a maker, confirm that the character still reads instantly, the costume could plausibly be worn, all overlaps are intentional, and front and three-quarter views agree. Check that props do not float, boots make contact with the floor, shadows match the light, and the final crop preserves the costume silhouette.
The best cosplay transformation is not the version with the most decoration. It is the one that keeps the character intact while making every layer, attachment, and material feel intentional. Explore VideoAny’s AI models when you are ready to test a controlled visual variation.
FAQs
How do I stop the face from changing with the outfit?
Use one approved reference, list facial and hair details as fixed, request only wardrobe changes, and reject any candidate that reshapes the face. A narrower edit is easier to evaluate than a full-scene restyle.
Should I animate the first good cosplay image?
Not yet. First produce front and three-quarter mockups and confirm that the layers, props, and proportions stay consistent. Animation amplifies unresolved continuity problems.
What should I repair instead of regenerating?
Use a local repair for a limited defect such as one cuff, buckle, hand, collar, or small overlap. Regenerate when the identity, anatomy, pose, or overall costume silhouette has drifted.
Can I sell an AI-generated concept based on an existing character?
That depends on the rights attached to the character, marks, source assets, and intended market. Treat a fan concept and an authorized commercial design as different categories, and obtain appropriate permission when the use extends beyond personal experimentation.