Categories: AI Anime, Character Design, AI Video Workflow
Tags: anime character creation, ai anime character, character consistency, reference images, videoany
Introduction
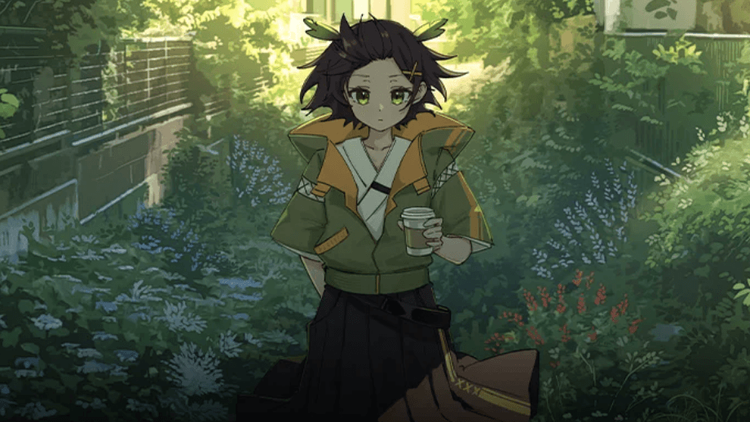
Creating one good anime portrait with AI is easy. Creating the same character again, in another pose, another scene, and another lighting setup is the hard part. That is the real challenge for anime creators in 2026.
The problem is identity drift. A character keeps the general idea but loses the details that make them recognizable. The hair shape changes. The scarf disappears. The eyes look different. The outfit becomes a new design. For anime, those details are not decoration. They are the character.
The solution is not a longer prompt. The solution is a workflow: build references, lock defining features, test the character under pressure, then animate only after the design proves stable.
Why Character Consistency Breaks
Most AI image tools treat each prompt as a fresh request. If you type "silver-haired warrior with a red scarf," the model can create a strong image. If you type a similar prompt later, it may reinterpret the face, costume, age, or body shape.
This gets worse in video. A portrait can hide instability. Motion exposes it. If the character turns, runs, speaks, or appears in a second scene, the AI has to preserve identity from multiple angles.
That is why a production-ready AI anime character needs more than a name and a vibe. It needs visual anchors.
Step 1: Build a Reference Library
You do not need to draw. You need usable references.
Start with three to five images:
- front view
- three-quarter view
- side view
- full-body outfit view
- one expression or action pose
The purpose is not to create a perfect model sheet. It is to give the AI enough visual information to stop reinventing the character.
If you are starting from scratch, use Text to Image to explore designs. Pick one strong direction. Do not blend several unrelated results into one character. Converge before you animate.
Step 2: Lock the Defining Features
Write down what must stay the same. Keep it short and practical.

Important identity anchors include:
- hair color, shape, and silhouette
- eye color and style
- face shape and age impression
- outfit structure
- color palette
- signature accessory
- unique mark, weapon, pendant, or symbol
- posture and personality
Be specific where viewers will notice. "Short cobalt-blue bob with two long side strands" is stronger than "blue hair." But avoid turning the prompt into a technical spreadsheet. The more details you add, the more details the model can mishandle.
Use text for direction. Use images for identity.
Step 3: Test the Character Across Scenarios
A character that only works in one portrait is not ready for a series. Test the design before committing.
Run the character through:
- neutral portrait
- happy, angry, and surprised expressions
- walking or running pose
- close-up dialogue shot
- bright daylight
- low-light scene
- side angle
- simple action pose
Look for failure patterns. If the jacket pattern breaks during motion, simplify it. If the earrings disappear in side views, decide whether they matter. If the hair only works from the front, redesign the silhouette before building a story around it.
Step 4: Choose the Right Tool for the Stage
Different tools solve different problems. Illustration tools are useful for still designs. Reference-based systems are useful for consistency. Video tools are useful only after the design is stable enough to move.
VideoAny fits well as a production layer because you can develop a look, animate a strong frame, and test scene motion without treating each step as a separate project. A practical route is:
- Use Text to Image for design exploration.
- Save the strongest references.
- Use Image to Video for motion tests.
- Use Text to Video once the scene direction is clear.
Do not judge a character only by the first still. Judge whether the character survives the workflow.
Step 5: Move From Character to Story
A character becomes valuable when they can carry scenes. They should be able to run, react, speak, fight, laugh, or return in another episode without looking redesigned.
Use this order:
- Design the character.
- Build references.
- Lock key traits.
- Test poses and lighting.
- Generate one short scene.
- Review identity drift.
- Only then scale into a longer short or series.
This process feels slower at first, but it prevents larger mistakes later. It is much cheaper to fix a character sheet than to repair a whole multi-scene video.
Practical Tips
Use multiple references when possible. One portrait helps, but three angles are better.
Keep the silhouette readable. Anime characters are often recognized by shape before detail.
Use stable language. If one prompt says "crimson scarf" and the next says "red neck ribbon," the model may treat them as different items.
Test before spending heavily. Every tool handles anime, motion, and references differently.
Simplify unstable details. Tiny jewelry, complex jacket patterns, and layered accessories may look great in still art but fail during motion.
Conclusion
AI anime character creation is not just about generating a beautiful portrait. For creators making shorts, series, or story-driven videos, the real goal is repeatability.
Build references. Lock the features. Test the character in different situations. Animate only when the design can survive motion. That is how an AI-generated character becomes usable for production.
Next Step
Create your first anime character workflow with VideoAny.
FAQs
1) Can I create anime characters with AI if I cannot draw?
Yes. Start with generated references, select one design direction, and refine it into a reusable character library.
2) Why does my AI character change between scenes?
The workflow is probably relying too much on text and not enough on stable references, locked features, and scenario testing.
3) What should I test before animating a character?
Test expressions, poses, side views, lighting, and at least one motion shot before using the character in a series.